Thursday, February 14, 2013

Organized Tea & Hot Cocoa Cupboard.

Hey, everyone! How was everyone's weekend? Mine was full of organizing. One organization project I got done that I am particularly proud of is turning this:

Into this:

What a difference! And it only took about a half an hour! I'm very happy to have gotten this done because now there's a little bit more storage in our kitchen than there was before. And in our small, galley, apartment kitchen, every shelf counts! To be fair, the old way (put in place by my boyfriend) actually did have a system: Tea on the bottom shelf and hot cocoa on the next shelf up. But it didn't make a lot of sense in a kitchen with so little space. Especially when you can find an easy way to fit the contents of two shelves onto one.

Since my boyfriend was a little resistant to me changing his system around, I was originally only going to move his Earl Grey tea (yellow box on the far left of the first picture) into a smaller container. Honest. Its original packaging was half empty. My boyfriend saw my point that the Earl Grey was taking up twice as much space as necessary. But then he left the kitchen and after I moved the Earl Grey into a smaller container, I got to looking through all the other boxes of tea and they were all at least half empty as well. So I used more small containers for the tea. Although you can't really see it from the picture above, the green container on the far left is Earl Grey only. Moving right, the next two green containers are full of most of the other teas we have. The only teas that didn't get taken out of their original packaging is our supply of loose-leaf tea. So much space saved!

Once I got *most* of the tea out of its original packaging and into smaller containers, I had enough room to put all of the hot cocoa on the same shelf, as long as it was moved into a smaller container as well. After I did that, the new tea/hot cocoa shelf was done! And I now had an empty shelf to fill. As you can see, the next shelf up in the picture above isn't exactly full but it still fills a purpose. It is now where the coffee/coffee filters, peanut butter, syrup and honey are kept. I did this mostly to free up at least a little space in our food cupboard. I think this system will work well because everything is much more accessible than it was before.

Interested in where I got the containers I used? I had all of them on hand but I found the green containers at BigLots in sets of three for $1.50 and the hot cocoa container at Staples in sets of three for $1. Anyway, I hope my little project inspired you or gave you some simple ideas for your own kitchen.

Monday, February 11, 2013

Organized Bookshelf!

A couple of weeks ago, I bought this bookshelf because I was tired of my textbooks ending up on the couch. We have a big couch, but I'd rather have 1/3 of the couch not be covered with textbooks, notebooks  and binders when I'm not using them. You see, although I don't intend for this, I do most of my studying on the couch. I know, not the most traditional (or most practical) study spot, but this couch is so comfy! Anyway, back to the topic at hand. Before I got the bookshelf, my school stuff didn't really have a place besides on the couch. So that's where they usually were. ALL of them. This made it impossible to clean the couch off because there was nowhere to put my school stuff where they could all be in the same spot. So frustrating. When I realized Target had a good-sized shelving unit at a great price, I had found the answer to my problems.
(Sorry about the poor image quality! I took this at night so there was no natural light coming in the window.)
I bet I know what you're thinking: "Why is the bookshelf crooked?!" Honestly, you get what you pay for. At $30, I don't expect anything more than mediocre quality but the bookshelf really does seem sturdy enough! It's not super wobbly or anything. Believe me, if I had it in my budget to buy a higher quality shelf of the same size, I would have. Since I don't, this shelf will do for now. So what all do I have on this bookshelf? Let's take a look:
The top shelf is for some of my my boyfriend's stuff. This is where he keeps his shot glass collection (the shot glasses finally have somewhere to go! Yay!), humidor, pipe tobacco, pipe, a puzzle and his book collection. Note: My boyfriend isn't a heavy smoker but he enjoys an occasional cigar/pipe. :)
Can you tell the second shelf down is mine? :-P This is where I keep my reading books, pens, pencils, tape, tape measure and stapler. 
Again, sorry about the image quality! The lighting in my living room really is bad at night. Anyway, this shelf is also for some of my boyfriend's stuff. For now, he has his DVDs and a canister looking jar, which is actually a light, on this shelf. Also on this shelf WAS a key rail and shelf waiting to be installed. Both are now installed (as of today), which leaves more room on the shelf.
On the next shelf down is my DVD collection and the photo albums my mom put together for me as a Christmas present one year (love those albums!)
On the bottom shelf, I have my school stuff. Textbooks (from this semester and some particularly important/useful ones from past semesters), notebooks from this semester and past semesters and accordion files with all my work from two past semesters.

There you have it. Since we got this shelf, our entire apartment (not just the couch), is noticeably less cluttered! Awesome!

Friday, February 8, 2013

If at first you don't succeed, try again!


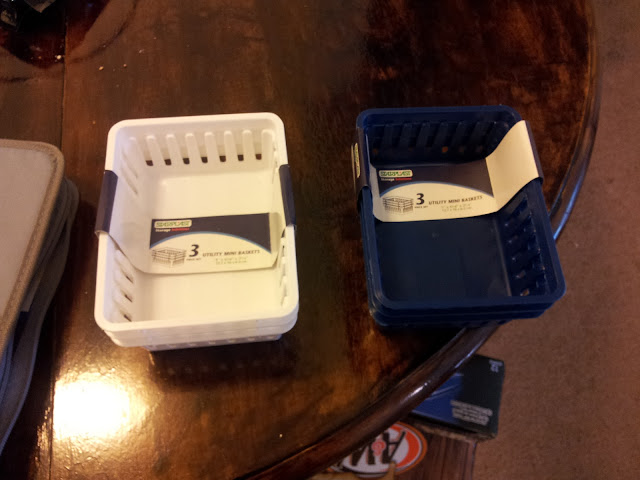
So a few days back, I decided I was tired of our supply of batteries rolling around in the drawer they're kept in every time the drawer is opened or closed. I was tired of the batteries getting scattered throughout the drawer and I was tired of the drawer being a mess *partially* because of the batteries. I figured it would be simple enough to find a container for the batteries. In fact, I already had this in mind. I figured I could just go pick up two (one for AAs and the other for AAAs) at Staples and be set. But the Staples near me didn't have the size I needed so it was onto plan B: Find another container that would work. It wasn't long before I found what I *thought* I was looking for in the $1 section:
I grabbed two sets because it was such a good deal, and I knew I'd find some organizational purpose for them sooner or later. I was already planning on using 1-2 for batteries until...
Once I got the batteries in the bin, they just weren't pretty enough and as you can see, they didn't fit all that nicely. So it was onto plan C. I started going through all the organizational bins I have in my "organization supply" to see if I had anything that might work. I found these:
(For anyone wondering, I got these at Target for $1 each.)
I decided it was worth a try so I put the batteries in one of these little blue bins. I forgot to take a picture to show you what the problem was, but it was pretty much what the problem was with plan A. And now we're at plan D. I figured it wouldn't hurt to try one more set of containers I had on hand. I got them in the $1 section at Target, not sure what I'd use them for but unable to pass up divided organizers for $1 each. It was a good buy:
Maybe I'm weird, but I love how pretty they look. There was even room for the miscellaneous batteries that we don't actually buy but somehow end up with! Yay! All organized and stuff. :-)

This whole thing of trying multiple different ways to organize something just reminded me that it's better to find an organizational system that actually works and fits the item you're trying to organize, instead of using something that just works. The containers I bought for $1 at Staples might not work for batteries, but I know they'll be just right for something else waiting to be organized in my house.

Project Organized Closet (Part 2)

Scarves! I don't know about you, but with every closet I've had and every scarf organizational system I've tried, keeping my scarves in order has always been a problem. It's gotten pretty ridiculous since I started college three years ago, a.k.a since I move to one of the snowiest cities in the US and my mom who knits insisted I needed plenty of heavy knitted scarves. Love her and the scarves, though (please excuse the state of my bedroom. I know, it's a hot mess):
I don't know if you can tell from this picture, but I did have my scarves on a hanger with shower curtain rings. Just in case you can't see what the problem is with heavy scarves hanging from a hanger like this, here it is:

This was ALWAYS happening. I guess I didn't think about the fact that I have two cats who love climbing around our closet (even though they know they're not supposed to) when I decided to give this system a try (found here). Don't get me wrong. I still think this could be an awesome system for scarf organization. But it's not for me. So then the question was, what was for me? Before I had my scarves on a hanger, I had them in a drawer (like this one). Obviously, that didn't work because the scarves would get all wrapped and tangled around one another from me digging around in the drawer, taking things out, putting things back in again... And the drawer was almost too small to fit all my scarves. 

I started thinking about what would work for me. It wasn't long before I found my answer. I forgot to take a picture of what it looked like empty, but you can take a look at it here. So far, I love that this organizer is metal and more than strong enough to hold my heavy knitted scarves. And the price is great. So, here's my scarves all newly organized and pretty and right next to my newly organized and pretty purses:
Pretty, right? And with plenty of empty scarf-spaces to fill! :D

Wednesday, February 6, 2013

Project Organized Closet (Part 1)

Over the weekend, I decided to tackle a big problem that had been plaguing my and my boyfriend's closet: My shoes and purses. Now, my boyfriend's suggestion was to simply get rid of all but one pair of shoes and all but one purse. I know! Appalling, right? For obvious reasons, I wasn't going to do that. :) Really, it's not that I have a ridiculous amount of shoes and purses. Not yet, anyway. :-P But the shoes and purses I do have wind up all over the floor of our decent size walk-in closet. At least, before this weekend.

So, to start, I'll show you pictures of what our closet looked like before I started my project:
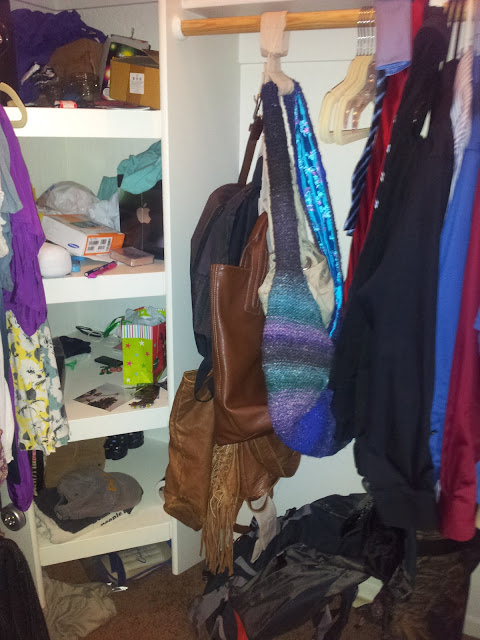
This is what you see to the left of the closet door (my side).
This is what you see looking straight into the closet.
This is what you see to the right of the closet door (boyfriend's side).
And this is the floor.

So basically, the problem was that there was nowhere to put  a lot of our stuff that we keep in our closet. Along with my purses and shoes, there was nowhere to put my boyfriend's hiking/camping backpack, his two rifles and his one shotgun. So all this stuff just wound up in the middle of the closet. 
The first part to be tackled was the purses. I've tried several purse organizers over the years. For one reason or another, they don't work out. But when I was at Bed, Bath, & Beyond last week, I found one that I haven't tried before and looked like it might work. I forgot to take a picture of it when it was empty so you could see its design but here it is on Bed Bath & Beyond's website.

If you'll notice, this product has one review and it's very low. So far, I think the exact opposite of what that review says. Well, not the exact opposite. I do agree that the holders at the bottom are so low that anything you put on them would probably just sit on the floor but this organizer has enough holders at the top and middle that I don't see myself needing the bottom ones/. The material this organizer is made of is fairly tough. Canvas, maybe? Anyway, at $9.99, I'm happy with the quality. Mine has got quite a bit of weight on it and is holding up great. I even put my belts on there. Well, the two that I don't wear often. The one I always wear is kept on an organizer I have hanging on the back of our bedroom door.

Anyway, here are my purses now:
Pretty, right?  And yes, my purses are on my boyfriend's side of the closet. He sweetly agreed to give me some space on his side of our closet.


An unexpected plus to organizing your purses? Finding the digital camera that went MIA months ago! I found it in one of the purses I was carrying months ago but haven't touched since. Yay! Such a relief!

Next, were my shoes. I started by looking into different shoe organizers. Like purse organizers, I've always had bad luck with shoe organizers. I knew an over-the door shoe organizer wouldn't work for me because half my shoes are boots that are too big to fit in the pockets and I have too many shoes to fit them all in the organizer. Also because the two doors in our room that would fit an organizer (bedroom door and bathroom door) already have things on them. On the back of our bedroom door, I have an organizer for many different things (I plan on talking about that in a future post) and our bathroom door has a full-length mirror on one side and a towel hook on the other. So no over-the-door shoe organizers over here. A shoe organizer that hangs from the closet rod was out because they also don't have enough space for me. Those turning organizers that hang the shoes and rotate (like this) was out because something like that won't hold my boots and all the organizers of this type are too tall to be in my closet without being in the way of my clothes. So I found two options: this or this. Pros of the first option: sturdy, pretty. Cons of the first option: not available at my nearest Target, a little pricey, not sure if it would organize my shoes as nicely as I'd like. Pros of the second option: simple, affordable, would get the job done. Cons of the second option: doesn't look sturdy. In the end I decided to check Ross to see if they had anything like either of my options. They did! They had something like the second option for $14.99. I'll take it! :)

Here it is:
As soon as I got home, I got to work assembling it. It took all of ten minutes. Here it is assembled and in the closet:
Please excuse Grey, the kitty. She was curious about the strange looking object. :) Anyway, the shoe rack isn't even fully expanded. It's currently expanded as wide as my closet will allow, at 42'' or  about 107 cm. Its max is 45'' or about  114 cm. 
 So I started putting my shoes on the rack. Pretty, right?
 The finished product. About halfway through getting my shoes on here, I realized that I would be saving a lot of room if I stacked pairs of shoes where I could. Obviously, not an option for all my tall boots boot it would (and does) work for my flats, flip-flops and tennis shoes.
For my rain boots and not-Uggs boots, I decided to put them on the shelf right next to the shoe rack, since they're obviously too bulky for it to be practical to put them on the shoe rack. But they're still right next to all my other shoes and easily accessible.
 So I meant to put this picture earlier in this post but either Blogspot's not cooperating or I'm still figuring it out. Most likely the latter. Anyway this was the state of my shoes after I pulled them out of their former place in my closet but before I put them on the rack.  It seems bad until...
 
OMG! They all fit! With *some* room to spare! So I can totally buy more shoes and have somewhere to put them! :D Oh, wait... No, that's bad. Note to Self: No more shoes until you move into a place with a bigger closet. If you find a pair that you must have, don't let boyfriend see! :)

Well, that's part one of my organized closet! It's a work in progress so I'll be posting projects that I've been doing to get it more organized. 

Friday, February 1, 2013

Couponing!

Hi! So here goes my first "real" blog post. I'll be sharing how I go about finding my coupons and organizing them.

I'm new to couponing, but this is the routine I've developed so far.

First, I buy one copy of each of the two major Sunday newspapers in my area. Then, I sit down and pull out all the ads I'm interested in. Then? You guessed it. I flip through them and pull out all the pages with coupons I'd like to keep. The ads I don't want go into a pile and the ones I do want go into a separate pile. By the time that's done, this is usually what I end up with:
To the left are the weekly ads I keep and to the right are the ones I don't want.

Next, I (with the help of my boyfriend) cut out all the coupons and end up with a pile like this:
They are then organized into categories so it's easier for me to file them away into my coupon binder. For example, a coupon for Scrubbing Bubbles would go into the Cleaning category, since I have a divider dedicated to that in my binder. Last, the coupons are filed away into my coupon binder. This weekly process takes about an hour and a half-ish but that's with me getting distracted, taking breaks, watching TV, etc.

But before I'm completely done, I or my boyfriend (sometimes both) will go through the ads/coupons I don't want to make sure there's nothing I didn't want. This particular time, I missed quite a few useful coupons. Here's what was left of my recycle pile after I had double checked it:
(Please excuse Black Bear a.k.a Bear, the kitty. He loves to lay where he's not supposed to. Typical cat. :-P )

Despite Bear, hopefully you can clearly see the many less ads/coupons in my recycle pile after going through it a second time. Before:

After:

I also check Coupons.com and Target.com for new coupons every couple of weeks. If I find any I like, I print them up, cut them out and file them into my coupon binder. If you're concerned about using too much ink by printing coupons, I recommend printing in black and white and printing in "fast" mode, which should be a setting on most printers. If you'd really like to save on ink, think about investing in a laser printer. I haven't done it and don't have any plans to but it does save a lot in the long run on ink! 

And with that, there's my first "real" blog post. I hope it gave you some good ideas, or maybe inspired you to give coupons a try. If you have any tips/tricks/methods about anything coupons, I'd love to hear! :-)