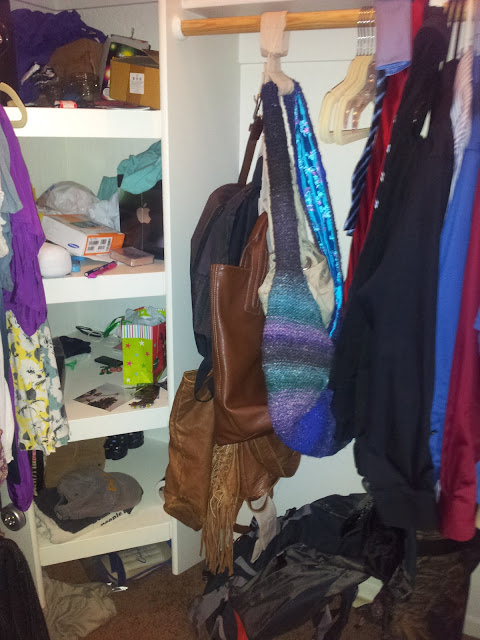
So, to start, I'll show you pictures of what our closet looked like before I started my project:
 |
| This is what you see to the left of the closet door (my side). |
 |
| This is what you see looking straight into the closet. |
 |
| This is what you see to the right of the closet door (boyfriend's side). |
If you'll notice, this product has one review and it's very low. So far, I think the exact opposite of what that review says. Well, not the exact opposite. I do agree that the holders at the bottom are so low that anything you put on them would probably just sit on the floor but this organizer has enough holders at the top and middle that I don't see myself needing the bottom ones/. The material this organizer is made of is fairly tough. Canvas, maybe? Anyway, at $9.99, I'm happy with the quality. Mine has got quite a bit of weight on it and is holding up great. I even put my belts on there. Well, the two that I don't wear often. The one I always wear is kept on an organizer I have hanging on the back of our bedroom door.
Anyway, here are my purses now:
 |
| Pretty, right? And yes, my purses are on my boyfriend's side of the closet. He sweetly agreed to give me some space on his side of our closet.
An unexpected plus to organizing your purses? Finding the digital camera that went MIA months ago! I found it in one of the purses I was carrying months ago but haven't touched since. Yay! Such a relief!
Next, were my shoes. I started by looking into different shoe organizers. Like purse organizers, I've always had bad luck with shoe organizers. I knew an over-the door shoe organizer wouldn't work for me because half my shoes are boots that are too big to fit in the pockets and I have too many shoes to fit them all in the organizer. Also because the two doors in our room that would fit an organizer (bedroom door and bathroom door) already have things on them. On the back of our bedroom door, I have an organizer for many different things (I plan on talking about that in a future post) and our bathroom door has a full-length mirror on one side and a towel hook on the other. So no over-the-door shoe organizers over here. A shoe organizer that hangs from the closet rod was out because they also don't have enough space for me. Those turning organizers that hang the shoes and rotate (like this) was out because something like that won't hold my boots and all the organizers of this type are too tall to be in my closet without being in the way of my clothes. So I found two options: this or this. Pros of the first option: sturdy, pretty. Cons of the first option: not available at my nearest Target, a little pricey, not sure if it would organize my shoes as nicely as I'd like. Pros of the second option: simple, affordable, would get the job done. Cons of the second option: doesn't look sturdy. In the end I decided to check Ross to see if they had anything like either of my options. They did! They had something like the second option for $14.99. I'll take it! :)
Here it is:
As soon as I got home, I got to work assembling it. It took all of ten minutes. Here it is assembled and in the closet:
So I started putting my shoes on the rack. Pretty, right?The finished product. About halfway through getting my shoes on here, I realized that I would be saving a lot of room if I stacked pairs of shoes where I could. Obviously, not an option for all my tall boots boot it would (and does) work for my flats, flip-flops and tennis shoes. For my rain boots and not-Uggs boots, I decided to put them on the shelf right next to the shoe rack, since they're obviously too bulky for it to be practical to put them on the shoe rack. But they're still right next to all my other shoes and easily accessible. So I meant to put this picture earlier in this post but either Blogspot's not cooperating or I'm still figuring it out. Most likely the latter. Anyway this was the state of my shoes after I pulled them out of their former place in my closet but before I put them on the rack. It seems bad until...
OMG! They all fit! With *some* room to spare! So I can totally buy more shoes and have somewhere to put them! :D Oh, wait... No, that's bad. Note to Self: No more shoes until you move into a place with a bigger closet. If you find a pair that you must have, don't let boyfriend see! :)
Well, that's part one of my organized closet! It's a work in progress so I'll be posting projects that I've been doing to get it more organized.
|


No comments:
Post a Comment