Sunday, August 4, 2013

Organized DVDs

Hey! Sorry I went MIA (again)! What can I say? School and work keeps me busy and exhausted. But now I'm back and hopefully going to start updating much more regularly. :-) By the way, if I have any readers out there, I'd love to hear from you!

A few months ago, I reorganized my DVD collection. Before I reorganized them, I had been keeping them in this CD/DVD organizer:
And it has pages like this:
 It has 206 pockets. Now, when I bought it, it was because I was getting ready to move into a small college dorm that I would be sharing with two other girls. Needless to say, space was an issue and I had just realized how much space my DVD collection takes up when every DVD was kept in its case. I was trying to figure out how my movies would be organized when living in a dorm. I quickly realized keeping every DVD in its case just wouldn't be practical, which led to me buying the above organizer.

The system worked well enough while I was living in a dorm but it was still far from perfect. It was hard to find DVDs in it because there was no practical way to organize the DVDs kept in it and as a result, it was always a bit of a hassle to find what I needed. It was also running out of space. While I don't quite have 206 individual movies, I do have quite a few season DVD sets of my favorite TV shows. And there's more I plan to get. So, I needed something with more room.

I started looking around on the Internet, Pinterest and various organization blogs. I quickly found Sam's solution at Simply Organized and decided to try it, while adjusting certain things so the system would work better for me. For example, Sam gave the kids' movies their own box. Since I don't have kids, I obviously wouldn't need a place for kids' movies.

Another thing I adjusted was the type of DVD sleeves I used. While I love the ones Sam used and I definitely plan to switch to those in the future, they were a little out of my budget at $13.99 for 25 sleeves, especially given how many DVDs I have. If you'd like to check out the ones Sam used, they're available here. The ones I ended up using were these. Aside from that, I used Target's version of these boxes to store my DVDs in and some card stock to make dividers.

Since I started this blog after I did this project, I don't have any visuals to show you of went on as I was reorganizing my DVDs. But I'll do my best to tell you what I did to get to the finished product. :-)

First of all, this project was really easy and didn't take too long. I started by going through my DVD collection and putting the ones I still watch in its own sleeve and the ones I no longer watch off to the side to be sold. By the end of this stage, here's what my "get-rid-of-pile" looked like (after I had put them all on cases and laid them out to be posted for sale on Craigslist):
Obviously, I didn't get rid of a ton of DVDs. Put I was able to make myself part with some! :-)

FYI: Most of my DVDs no longer have their original cases because when I left for college, I only brought the DVDs with me. The cases got left at home and my mom, thinking they were trash, ended up throwing them away. Oops. So up until recently, whenever I got new DVDs, I would just throw away the case and stick the DVD in the organizer. After I did this project, I decided to start saving the cases. Here's my collection so far:
Hopefully, I'll be able to upgrade my DVD sleeves to the ones Sam used (or something similar) in the future and that's when the DVD case artwork will be put to use. As for all my DVDs that no longer have the original case artwork, I know they can be printed up online. I would love to do that but it would be quite an investment in printer ink. We will see!

Anyway, enough about my possible future projects. Next, I began to alphabetize my DVDs and put each disk into its own sleeve. Once that was done, it was time to figure out how many DVDs would fit in each storage box. I ended up using three boxes and you can see for yourself how I decided to label them:

I figured labeling the boxes this way would leave room for growth in each box. And it did! Have a look:
Please excuse Bear the photo bomber! Moving on...
Although you may have already guessed, the next step I took was to make dividers. The ones Sam made over on her blog are way prettier but the ones I made will do, for now, until I most likely get bored with the blandness one day and go on a washi-taping rampage. :-)

To make the dividers, I took some card stock and cut it down to the size I needed and then used my label maker to mark where each divider would go in the boxes. The last step was to stick the dividers into the right spot.

Overall, a pretty easy and only a little bit time consuming project. Success!

How do you organize your CDs (for those of you out there who still have them) and DVDs? Do you keep them in their original boxes? Or did you have to start using a space-saving technique like I did?

Wednesday, March 6, 2013

Kitchen utensils!

Okay, so there wasn't much to this project but I'm very happy with it because the kitchen utensils finally go in a drawer that they can all fit into without any rearranging or wrestling trying to make them fit. See, the kitchen utensils, up until last week, shared a drawer with the silverware.  Here's a picture of how crowded it was:
It was just...messy and it made it difficult to put the utensils away and take them out. And all this was unnecessary because there was another drawer in the kitchen not being used:
 (Yes, that is a fish tank in the background. We just got a bigger tank and haven't gotten around to selling/cleaning the old one.)
Isn't this drawer huge? And it was being completely unused! So all there was to do was move the kitchen utensils from their original drawer to this one! I wiped the drawer down with a Lysol wipe, let it dry and moved everything over (while also getting rid of utensils we don't use):
They were so cramped in the other drawer! Now, they're not cramped and there's room for more! :D No more dreading putting kitchen tools away! And the silverware drawer looks a lot better too:

And the counter space above the drawer:

When I told my boyfriend I was going to do this, he was against it. He didn't want me changing his system, he should get to pick since he's the cook around here, his kitchen utensils have been in that drawer since he moved in. In response, I told him I was only making his system better and I should get to pick because I do all the dishes and am always the one to put the dishes away. So, I moved the kitchen utensils. Once I was done, I let my boyfriend see what I'd done. I told him if he didn't like it, he could move the kitchen utensils back to their original drawer. He won't admit to liking it but he also hasn't changed anything. Compromise! :)

So, there you go. How do you efficiently use your kitchen storage?

Old School Papers System!

Hey! Sorry, I know I've been gone for a bit. School is just crazy! Anyway, since I finally have a break tonight, I thought I'd tell you about a system I recently created. It's a simple solution for an annoying problem. What to do with all those school and class papers at the end of the year/semester/quarter. Whether you have children in school or you're currently in school, you know school is far from paperless. Yes, many college course instructors try to make their classes as paperless as possible but if you're like me, you need mostly everything on paper. The downfall of this is when the class is over I have a ton of papers that I no longer need but I also cannot simply throw them away. Maybe it's silly but I have trouble throwing away all the hard work I did for a class. But it's also impractical to keep my school papers in the binders I used throughout the semester. By the end of every semester, my binders and dividers are usually in pretty good shape so it's frustrating only using them for one semester and then packing them away under my bed because I don't have another place for all that paper. Then, when the next semester starts, I have to buy binders all over again. And they're not cheap! At least not for a college student.  Luckily, I've found the solution:

Accordion files! I found these ones in the $1 section at Target but I know Target switches out what they have in the $1 section so they won't always have these. Luckily, I see cheap accordion files at many stores. These really are the perfect solution.

After I got a few of these, I came home from Target totally pumped. I grabbed my binders from last spring semester and this past fall semester and got to work. I pulled all the papers from the first binder and moved them to one of the accordion files, giving each class of the semester its own section in its accordion file. I then labeled each section divider with the name of the class that section is for. Since I did this project before I started this blog, I don't have pictures of when I was doing the project. Sorry! But I will show you the insides of the folders so you can see what I mean (sorry the first picture is out of focus):
See? Pretty simple. I'm pretty sure I have more of my work from college class at my mom and step dad's house in California. I'll check when I'm home over the summer. Anyway, the folders now sit on my bookshelf, with all my composition books and notebooks from past semesters, just in case I ever need them:

My favorite part of this project is how it kept me from having to buy another binder this semester. Here's some pictures of the binder I used last semester and am using again this semester:
It's in great shape, right? Definitely too good of shape to be stuffed under my bed and forgotten about. Although, I must admit, it's starting to fall apart:
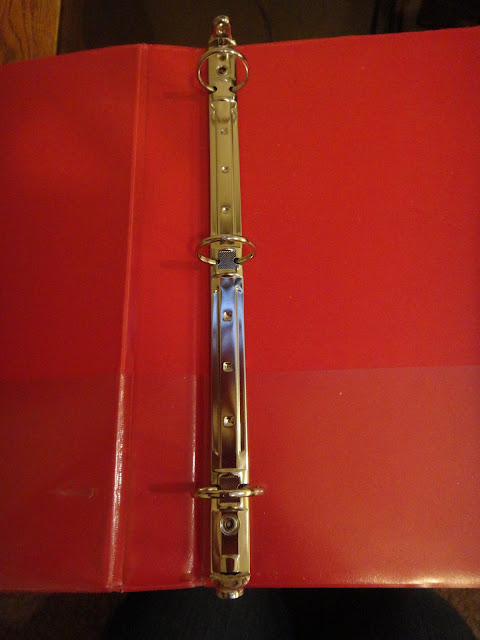
I know, I know. This thing doesn't have very much life left in it. I'd say it's got a couple of semesters left. :-P I also have another binder that used to be used for school, but is now waiting to be re-purposed:
 This binder has a scratch on the front:
 Other than that...
 it's in great shape!
Now to figure out what to do with it...

Quick tip for students: Try to use the same spiral notebook for as many classes as possible. For example, I use the same notebook for Spanish 102 as the notebook I used for Spanish 101. This keeps all of my Spanish notes together and makes it very easy for me to go back to my Spanish 101 notes if I ever need to. You could also use the same notebook for several unrelated classes but obviously, you won't be needing to reference old notes for an unrelated class you're in now. No matter what classes you use your notebooks for, using the same notebook for multiple classes will save money and paper. 

Well there you go! I hope this system helps you get organize as much as it's helped me! :) 

Because cutting boards take up too much space...


So we have a tiny apartment kitchen. It does have lots of storage space but because it's a galley kitchen, it's seriously lacking in counter space. When you're working with a kitchen this small, you really can't afford to lose that precious counter space. That being said, this was becoming a huge problem:
This little square of counter spaces is one of four counter space squares in our kitchen. With the cutting boards taking up half this square, that really only leaves three. Okay, maybe not half. But still. It's cramped.

I knew I had to get these cutting boards out of the way. Putting them in one of the cupboards wasn't really an  option, since we use them every day. Keeping them on the counter just makes the most sense.

Luckily, these cutting boards are out of the way now. Or as out of the way as they can be, I suppose. Anyway, I found the affordable ($5.99) solution at Bed Bath & Beyond:
I know, pretty basic, right? I bet you know what I did next.

Yup, put the cutting boards in their new home:
It's not a ton more space, but in a kitchen this small, every bit counts!

So how do you store your cutting boards?

Thursday, February 14, 2013

Organized Tea & Hot Cocoa Cupboard.

Hey, everyone! How was everyone's weekend? Mine was full of organizing. One organization project I got done that I am particularly proud of is turning this:

Into this:

What a difference! And it only took about a half an hour! I'm very happy to have gotten this done because now there's a little bit more storage in our kitchen than there was before. And in our small, galley, apartment kitchen, every shelf counts! To be fair, the old way (put in place by my boyfriend) actually did have a system: Tea on the bottom shelf and hot cocoa on the next shelf up. But it didn't make a lot of sense in a kitchen with so little space. Especially when you can find an easy way to fit the contents of two shelves onto one.

Since my boyfriend was a little resistant to me changing his system around, I was originally only going to move his Earl Grey tea (yellow box on the far left of the first picture) into a smaller container. Honest. Its original packaging was half empty. My boyfriend saw my point that the Earl Grey was taking up twice as much space as necessary. But then he left the kitchen and after I moved the Earl Grey into a smaller container, I got to looking through all the other boxes of tea and they were all at least half empty as well. So I used more small containers for the tea. Although you can't really see it from the picture above, the green container on the far left is Earl Grey only. Moving right, the next two green containers are full of most of the other teas we have. The only teas that didn't get taken out of their original packaging is our supply of loose-leaf tea. So much space saved!

Once I got *most* of the tea out of its original packaging and into smaller containers, I had enough room to put all of the hot cocoa on the same shelf, as long as it was moved into a smaller container as well. After I did that, the new tea/hot cocoa shelf was done! And I now had an empty shelf to fill. As you can see, the next shelf up in the picture above isn't exactly full but it still fills a purpose. It is now where the coffee/coffee filters, peanut butter, syrup and honey are kept. I did this mostly to free up at least a little space in our food cupboard. I think this system will work well because everything is much more accessible than it was before.

Interested in where I got the containers I used? I had all of them on hand but I found the green containers at BigLots in sets of three for $1.50 and the hot cocoa container at Staples in sets of three for $1. Anyway, I hope my little project inspired you or gave you some simple ideas for your own kitchen.

Monday, February 11, 2013

Organized Bookshelf!

A couple of weeks ago, I bought this bookshelf because I was tired of my textbooks ending up on the couch. We have a big couch, but I'd rather have 1/3 of the couch not be covered with textbooks, notebooks  and binders when I'm not using them. You see, although I don't intend for this, I do most of my studying on the couch. I know, not the most traditional (or most practical) study spot, but this couch is so comfy! Anyway, back to the topic at hand. Before I got the bookshelf, my school stuff didn't really have a place besides on the couch. So that's where they usually were. ALL of them. This made it impossible to clean the couch off because there was nowhere to put my school stuff where they could all be in the same spot. So frustrating. When I realized Target had a good-sized shelving unit at a great price, I had found the answer to my problems.
(Sorry about the poor image quality! I took this at night so there was no natural light coming in the window.)
I bet I know what you're thinking: "Why is the bookshelf crooked?!" Honestly, you get what you pay for. At $30, I don't expect anything more than mediocre quality but the bookshelf really does seem sturdy enough! It's not super wobbly or anything. Believe me, if I had it in my budget to buy a higher quality shelf of the same size, I would have. Since I don't, this shelf will do for now. So what all do I have on this bookshelf? Let's take a look:
The top shelf is for some of my my boyfriend's stuff. This is where he keeps his shot glass collection (the shot glasses finally have somewhere to go! Yay!), humidor, pipe tobacco, pipe, a puzzle and his book collection. Note: My boyfriend isn't a heavy smoker but he enjoys an occasional cigar/pipe. :)
Can you tell the second shelf down is mine? :-P This is where I keep my reading books, pens, pencils, tape, tape measure and stapler. 
Again, sorry about the image quality! The lighting in my living room really is bad at night. Anyway, this shelf is also for some of my boyfriend's stuff. For now, he has his DVDs and a canister looking jar, which is actually a light, on this shelf. Also on this shelf WAS a key rail and shelf waiting to be installed. Both are now installed (as of today), which leaves more room on the shelf.
On the next shelf down is my DVD collection and the photo albums my mom put together for me as a Christmas present one year (love those albums!)
On the bottom shelf, I have my school stuff. Textbooks (from this semester and some particularly important/useful ones from past semesters), notebooks from this semester and past semesters and accordion files with all my work from two past semesters.

There you have it. Since we got this shelf, our entire apartment (not just the couch), is noticeably less cluttered! Awesome!

Friday, February 8, 2013

If at first you don't succeed, try again!


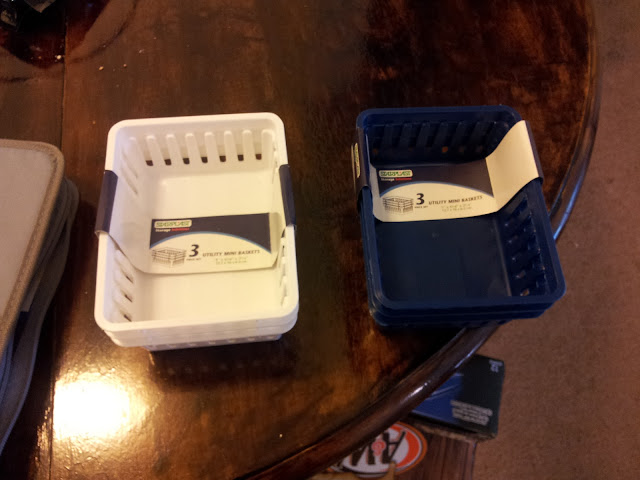
So a few days back, I decided I was tired of our supply of batteries rolling around in the drawer they're kept in every time the drawer is opened or closed. I was tired of the batteries getting scattered throughout the drawer and I was tired of the drawer being a mess *partially* because of the batteries. I figured it would be simple enough to find a container for the batteries. In fact, I already had this in mind. I figured I could just go pick up two (one for AAs and the other for AAAs) at Staples and be set. But the Staples near me didn't have the size I needed so it was onto plan B: Find another container that would work. It wasn't long before I found what I *thought* I was looking for in the $1 section:
I grabbed two sets because it was such a good deal, and I knew I'd find some organizational purpose for them sooner or later. I was already planning on using 1-2 for batteries until...
Once I got the batteries in the bin, they just weren't pretty enough and as you can see, they didn't fit all that nicely. So it was onto plan C. I started going through all the organizational bins I have in my "organization supply" to see if I had anything that might work. I found these:
(For anyone wondering, I got these at Target for $1 each.)
I decided it was worth a try so I put the batteries in one of these little blue bins. I forgot to take a picture to show you what the problem was, but it was pretty much what the problem was with plan A. And now we're at plan D. I figured it wouldn't hurt to try one more set of containers I had on hand. I got them in the $1 section at Target, not sure what I'd use them for but unable to pass up divided organizers for $1 each. It was a good buy:
Maybe I'm weird, but I love how pretty they look. There was even room for the miscellaneous batteries that we don't actually buy but somehow end up with! Yay! All organized and stuff. :-)

This whole thing of trying multiple different ways to organize something just reminded me that it's better to find an organizational system that actually works and fits the item you're trying to organize, instead of using something that just works. The containers I bought for $1 at Staples might not work for batteries, but I know they'll be just right for something else waiting to be organized in my house.